Total Solar Eclipse 2016 Indonesia
Warning: Staring directly at the Sun (except the totality) without a solar filter is dangerous. Do not do that.
Place, time
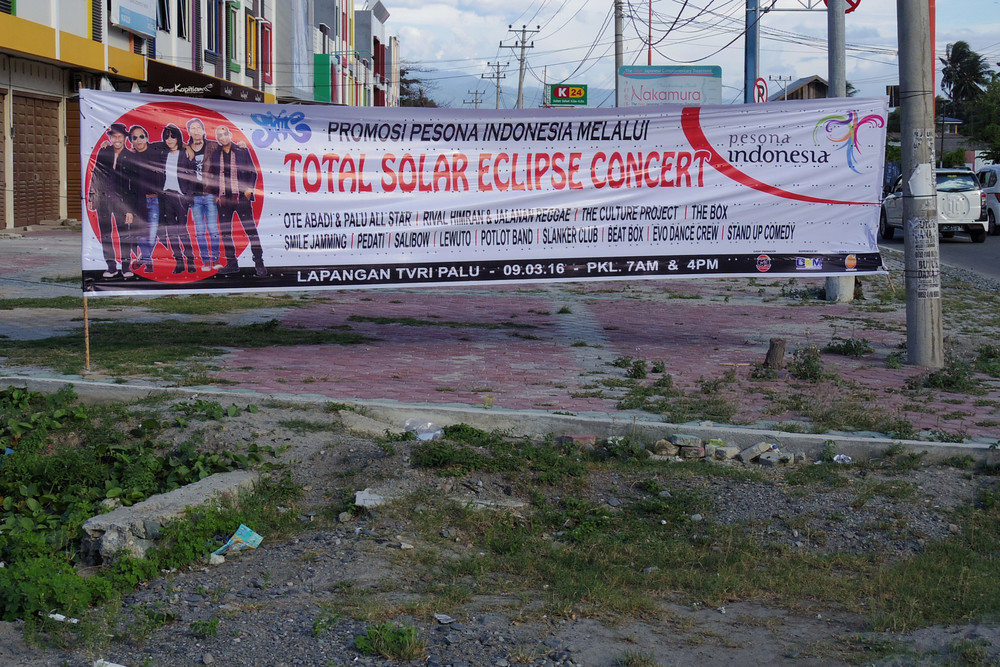
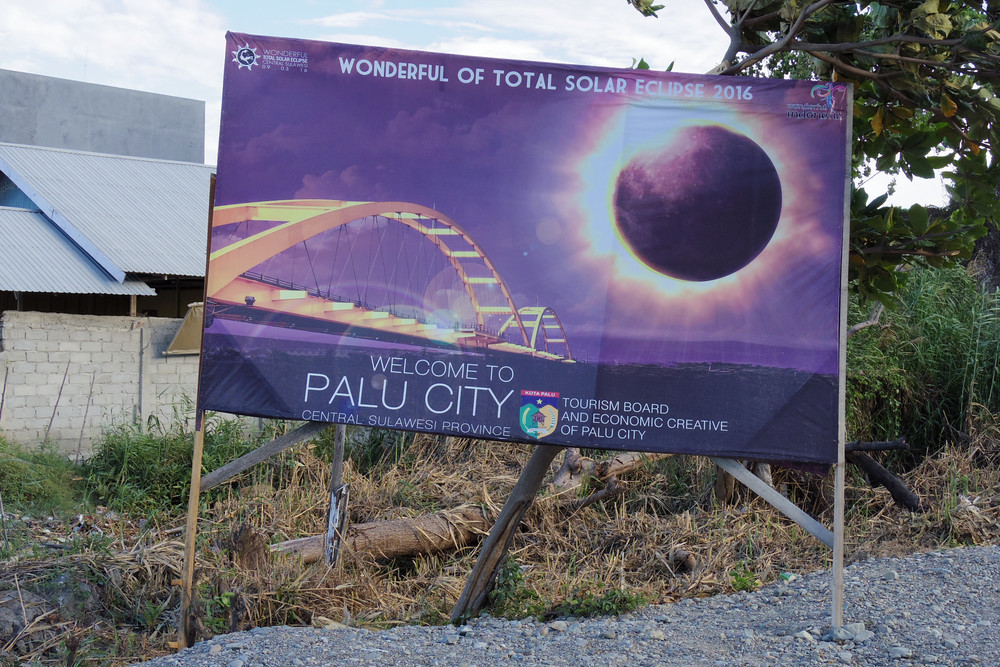
March 9th, 2016. Observation point at Kotapulu (close to Palu), Sulawesi, Indonesia. The Indonesian Vice President was also observing from here. It took a while to convince the local authorities that we do not really want to listen to the politician we are here for the eclipse. A rather international group of eclipse chasers were there including an other Hungarian group, you can check their pictures here.

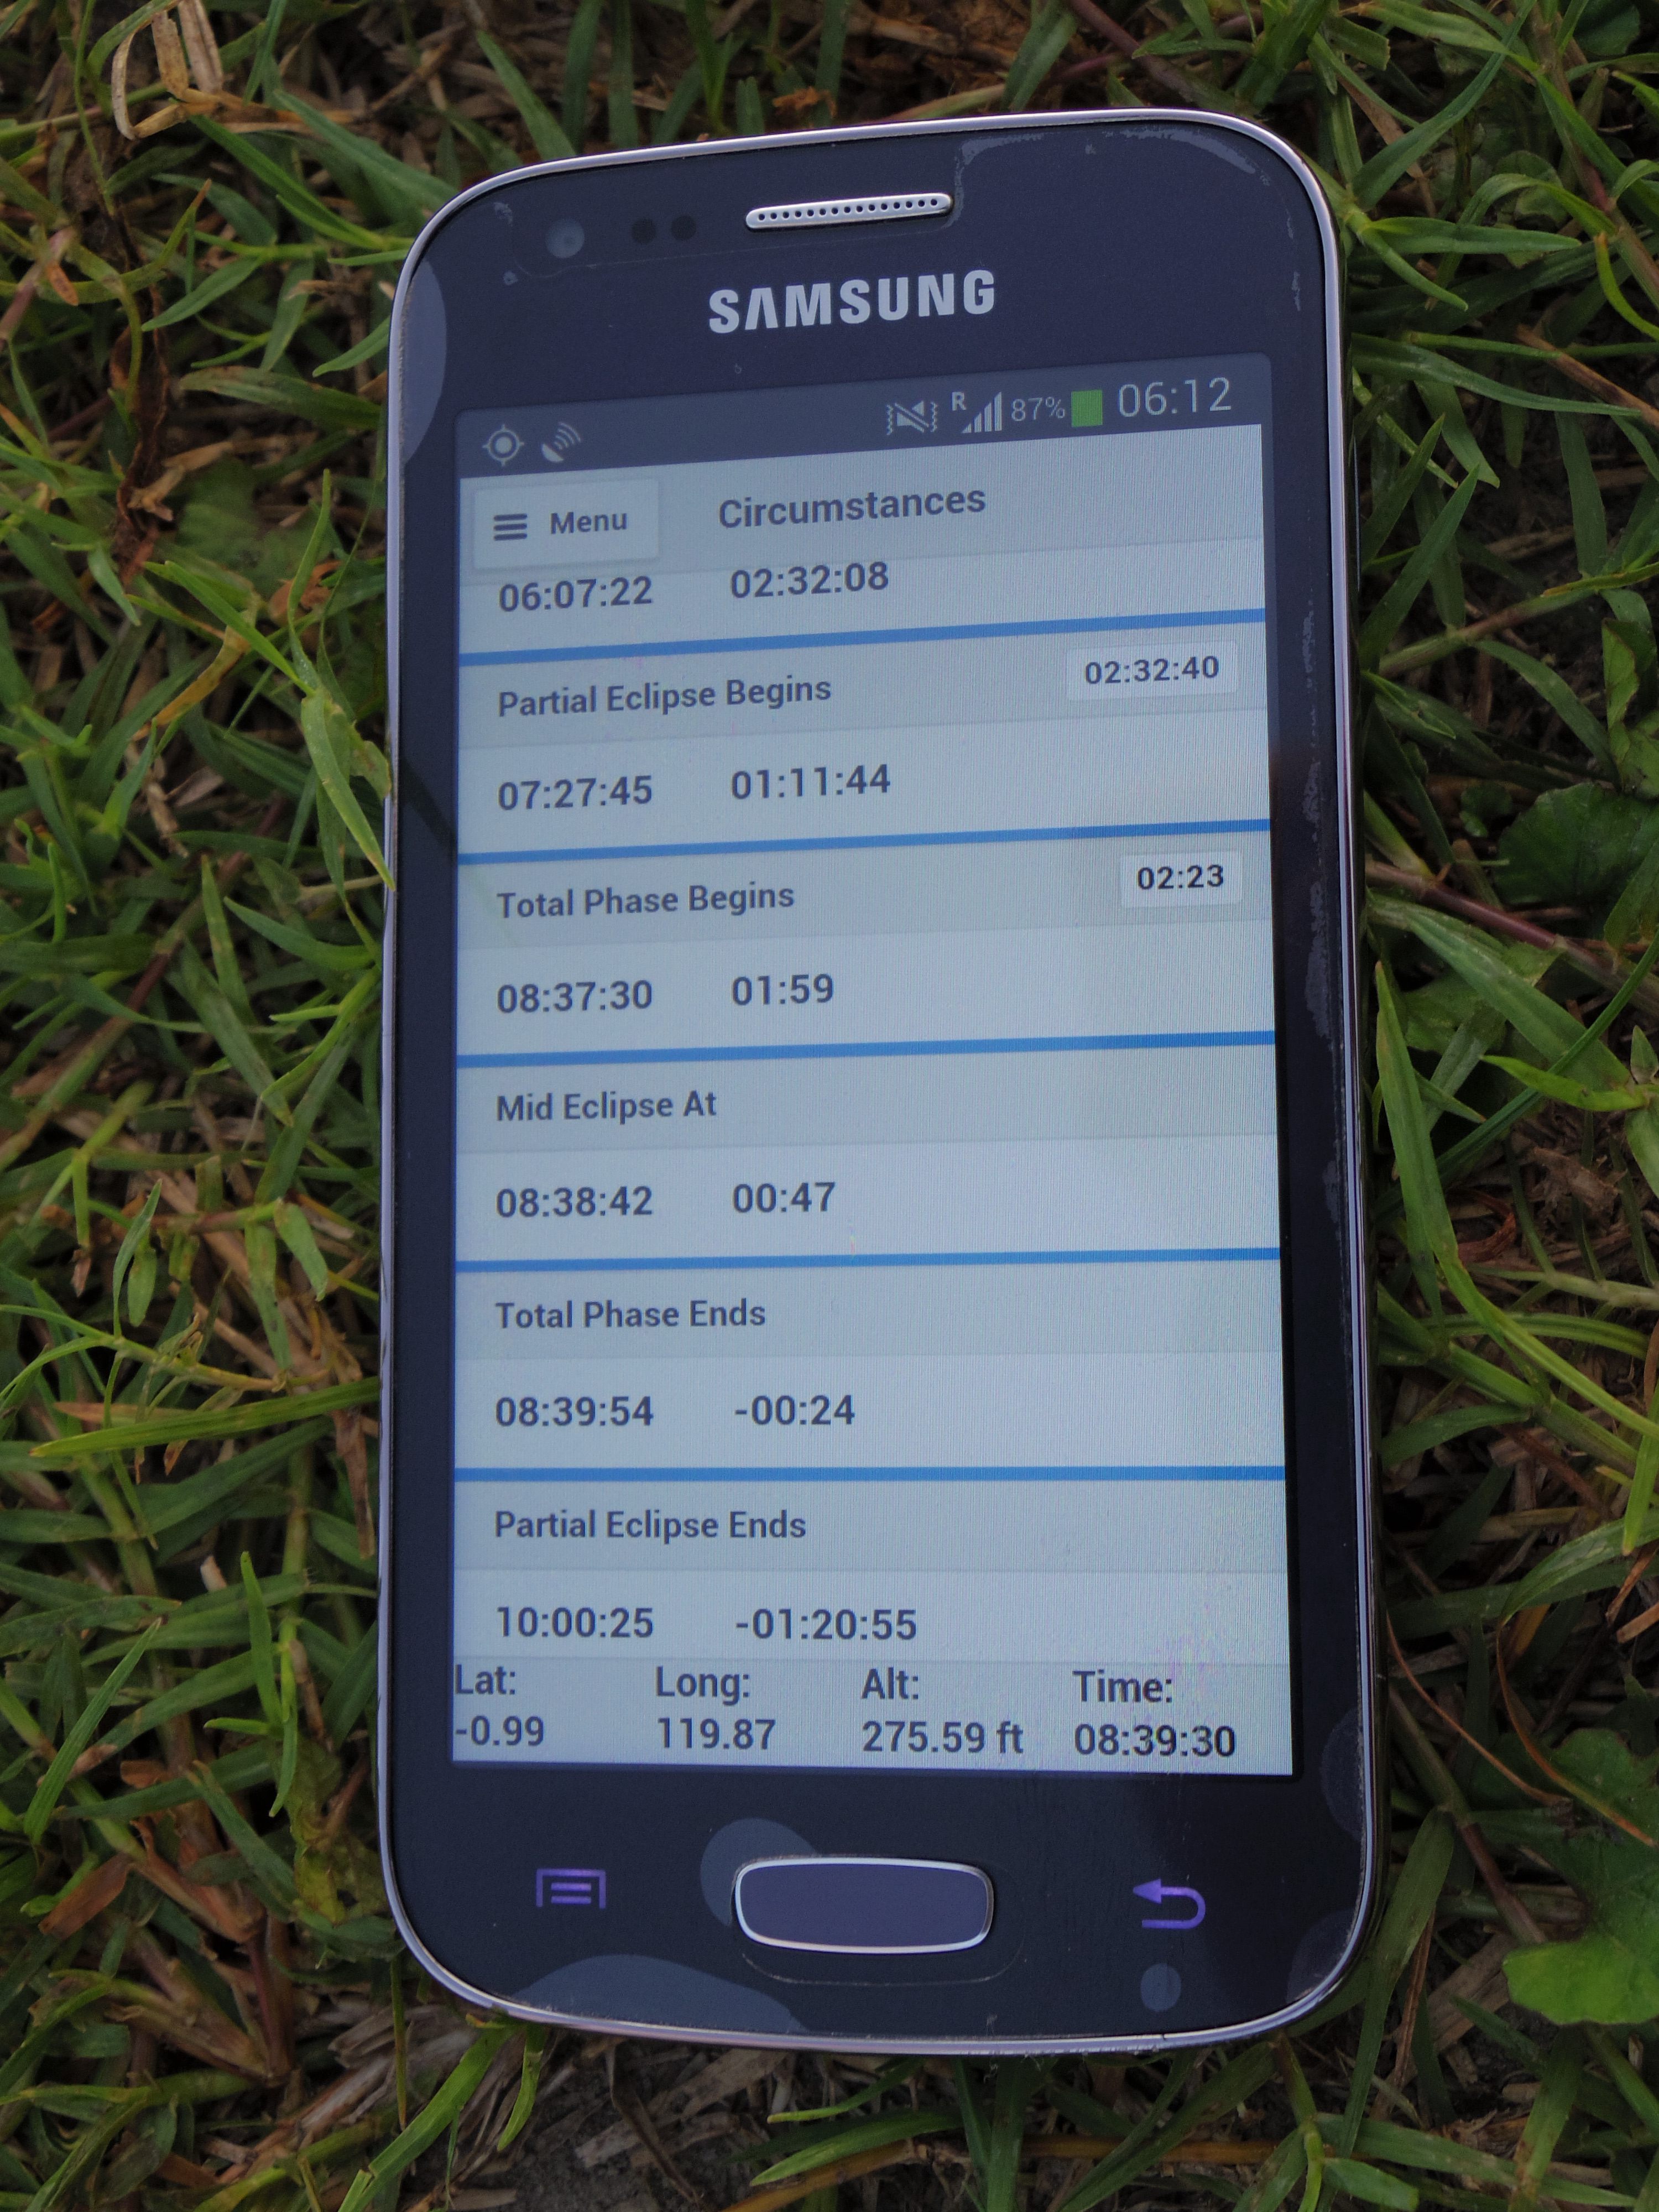
The GPS coordinates of the observation point: 0.990821 S,119.874038 E.
A detailed map (created by Xavier M. Jubier) can be found here.
Equipment
Most of the pictures were taken using the following equipment:- Tripod: EQ-3. I was using water bottles for counterweight. Using an equatorial mount is much more convenient compared to the standard photography tripod I was using at my previous solar eclipse observation (Turkey 2006). The disassembled tripod just fits my baggage (Actually I bought my baggage specially for this tripod).
- Telescope: SkyWatcher Maksutov-Cassegrain 102/1300.
- Camera: Pentax K-x (APS-C DSLR).
- I've attached my telescope to the camera using a T2 lens mount adapter for Pentax K mount (similar adapters are available for other camera brands as well). I was using the telescope as a 1300mm F/12.7 lens. The diameter of the Sun's image is 12mm on the sensor (as expected). This is quite close to the size of the APS-C sensor (23.6 x 15.8 mm).
- Filter: Baader Astrosolar OD 3.8.
- I was using a wireless remote control (ebay $1) to avoid shaking the tripod.( Mirror lockup, automatic interval shooting would have been also useful, but my camera does not support these features at the same time.)
- The camera needs 4 AA batteries, I bought a brand new package of lithium batteries. Of course I also had replacement batteries, just in case. It is always advised to use brand new (or fully charged) batteries, and should always have replacement batteries.

The equipment can be seen in the following (Hungarian language) video.
I was using Eclipse Chaser Mobile android app for contact time calculations. This program uses the GPS of the phone to calculate the times. There is a two-second difference compared to the times calculated by the google maps mentioned above. Although it's not a perfect program it was very useful.
Solar filter
We need a special filter for the solar photography (except the totality). I was using Baader Astrosolar Safety Film bought from the manufacturer. This time I had OD (=Optical Density) 5.0 and OD 3.8 films, but I was only using OD 3.8.
The OD 3.8 filter reduces the light intensity to 1/6309 (103.8 = 6309).
I've created a small filter for the 50mm lens and a bigger one for the telescope. Previously I've created rather simple filters, for this eclipse I've created filters using the method described in this youtube video:

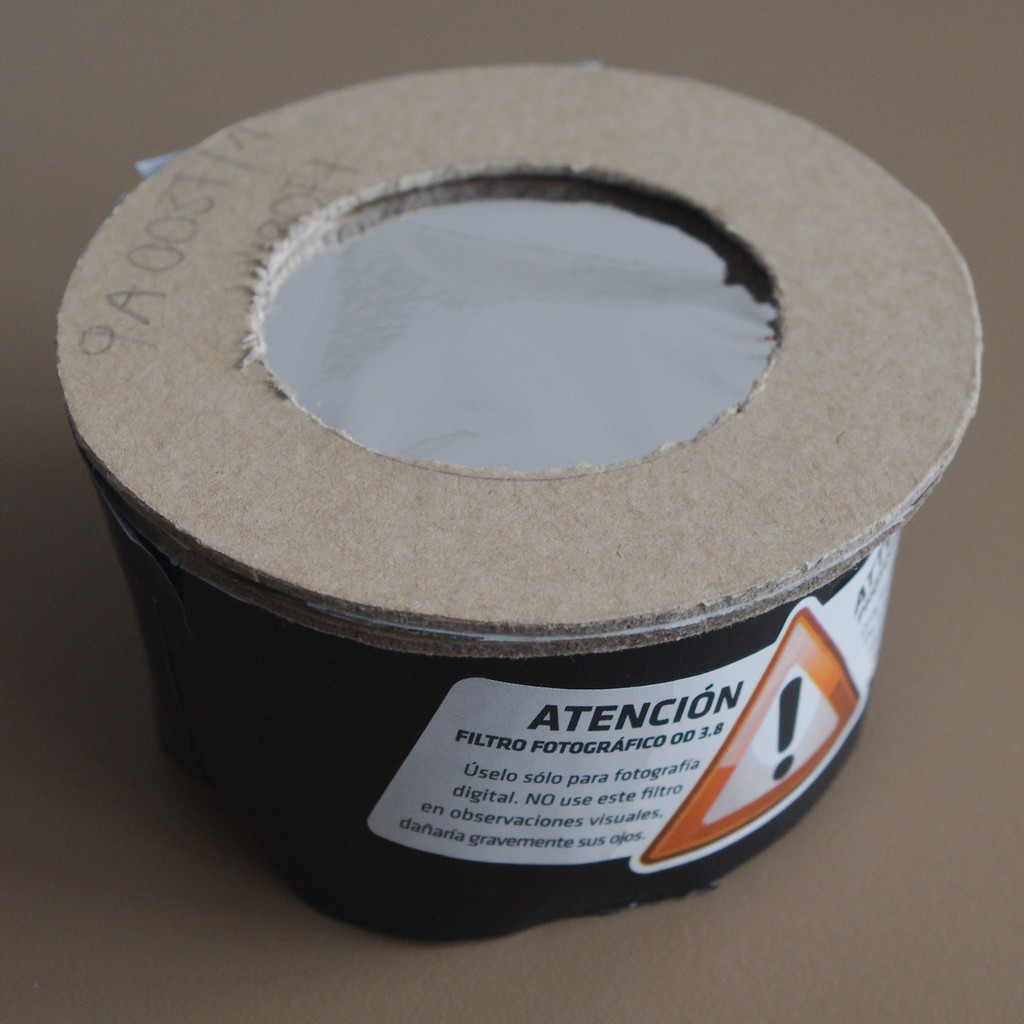

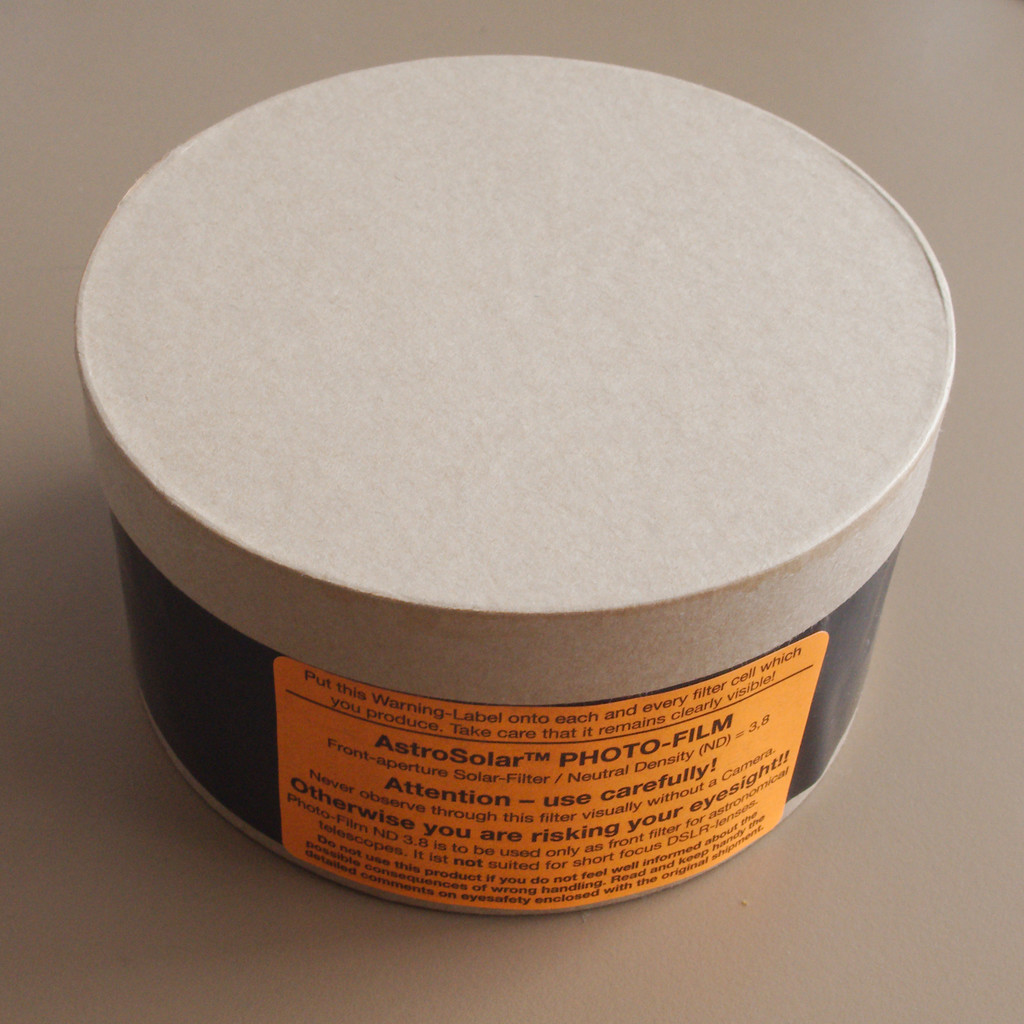
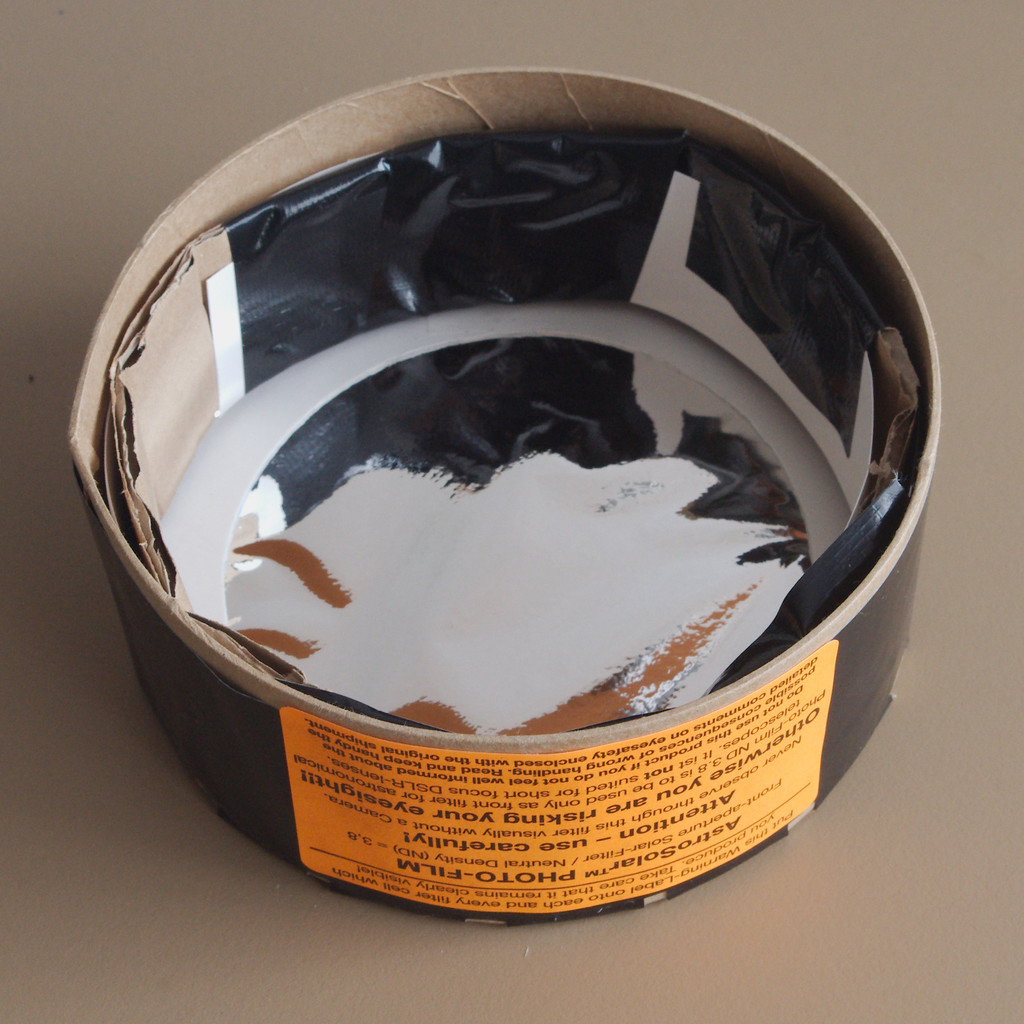

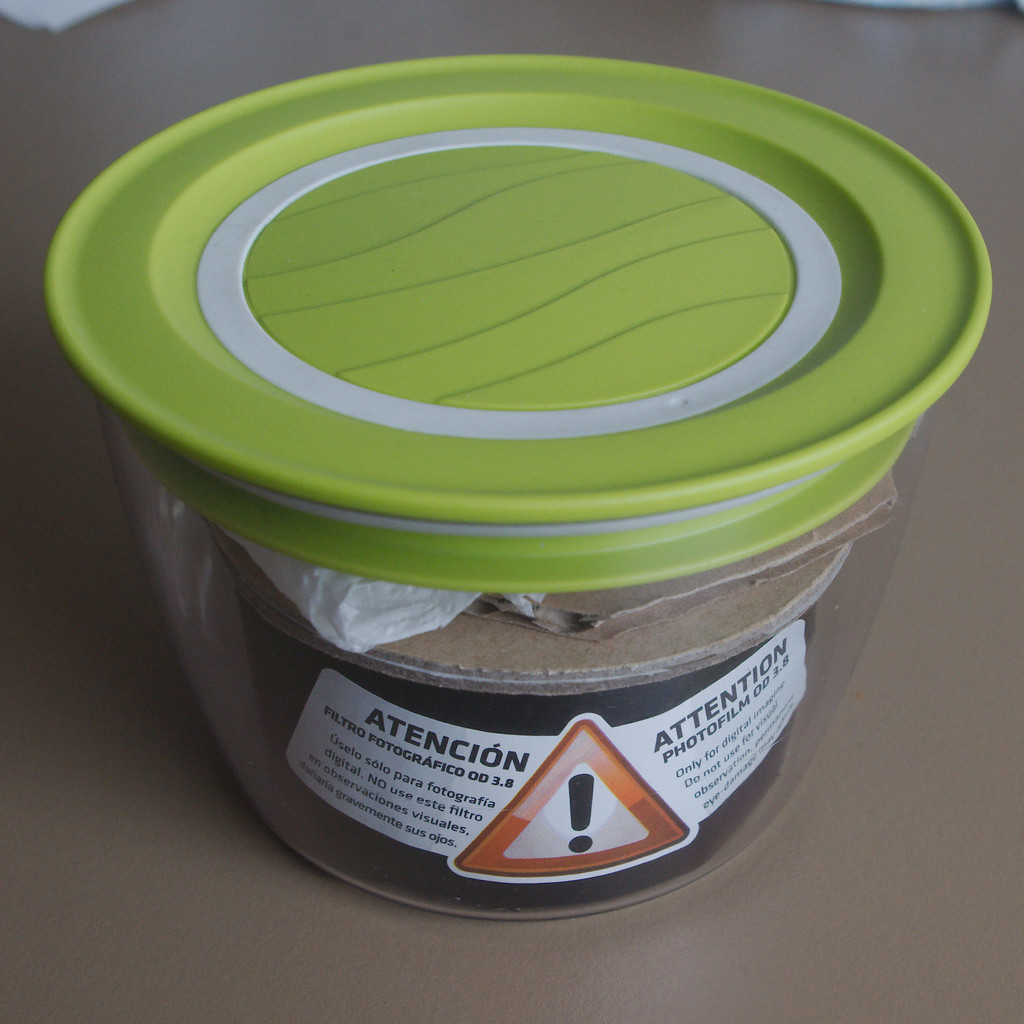
Please note the very nice warning stickers. I store my fragile filters in plastic food containers.
Partial

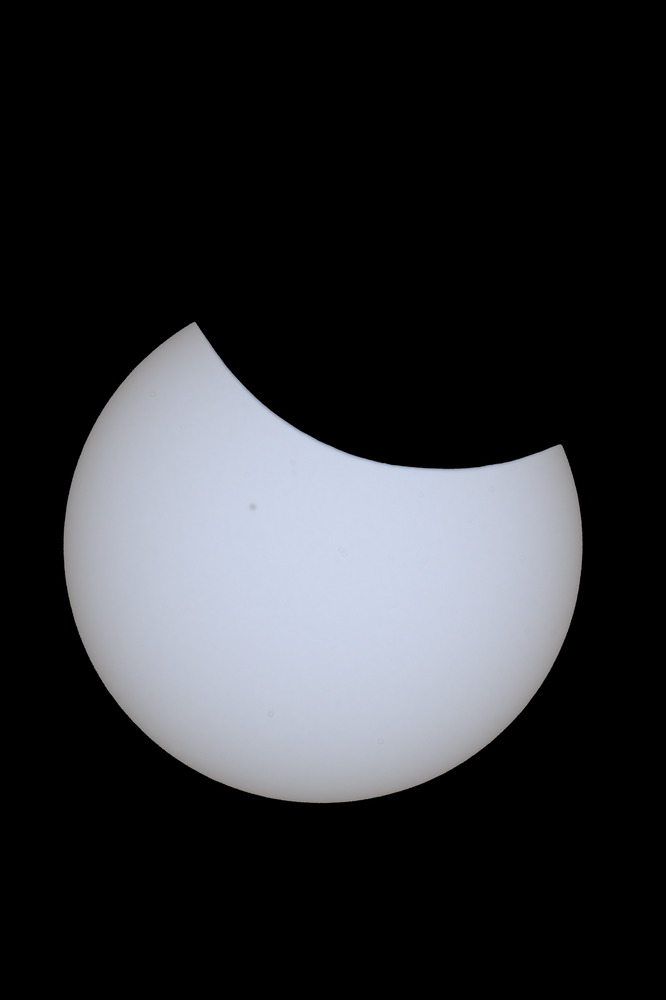

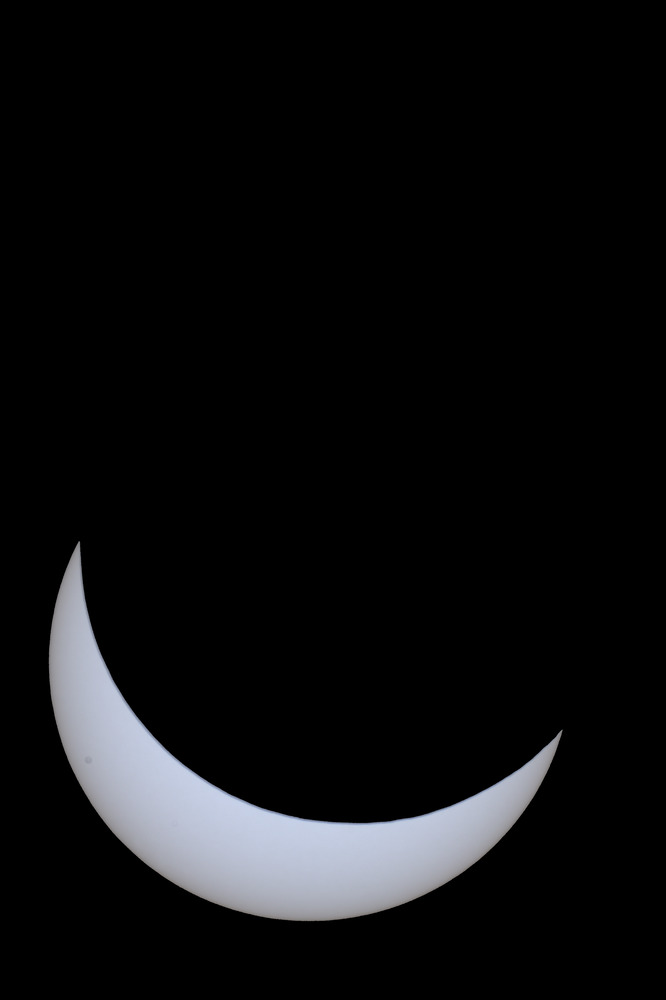
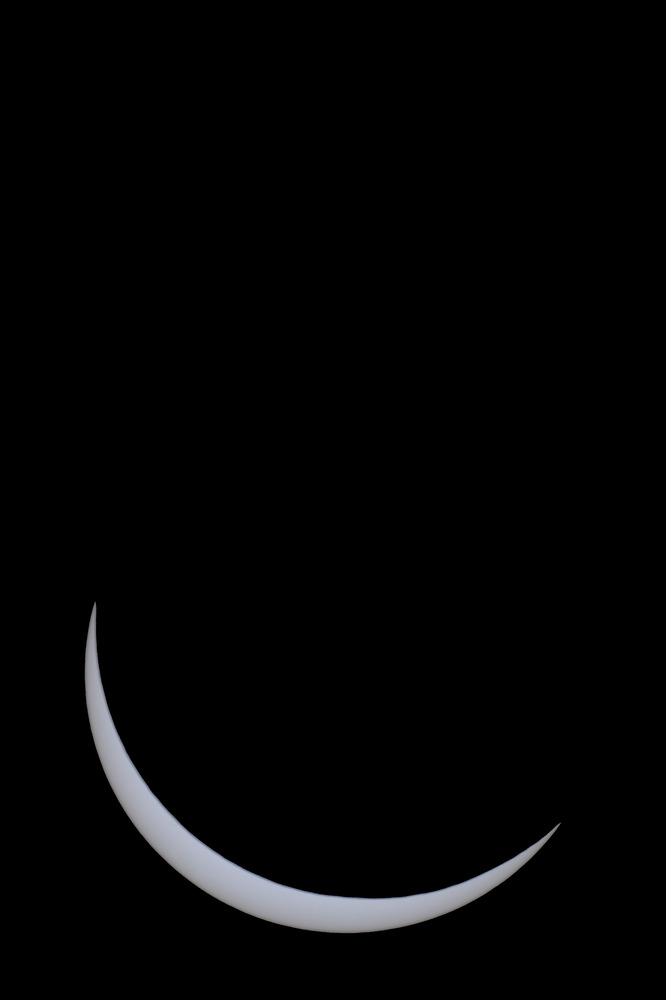
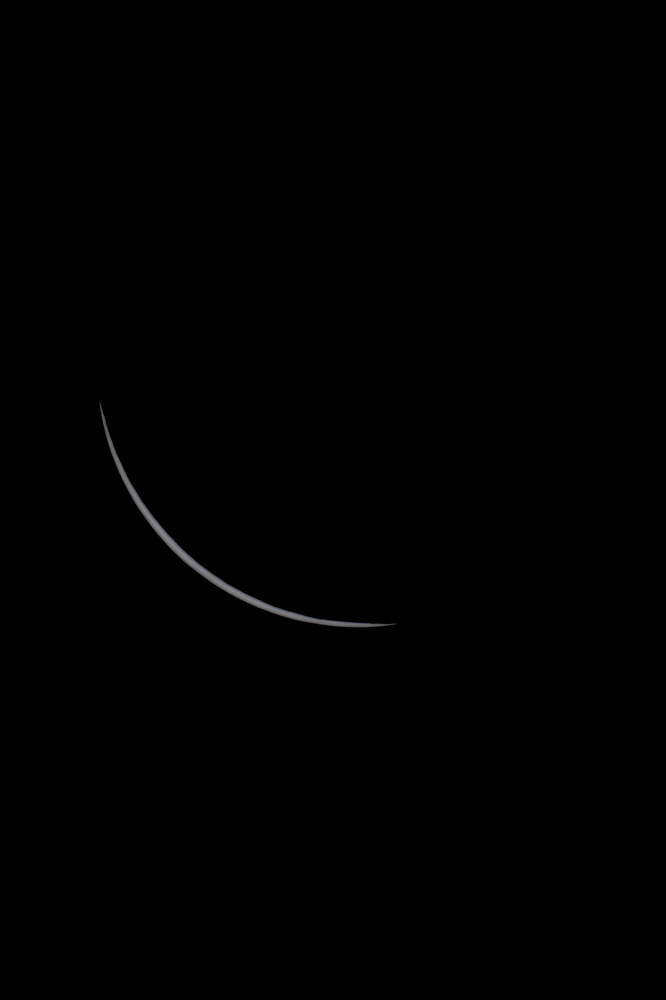
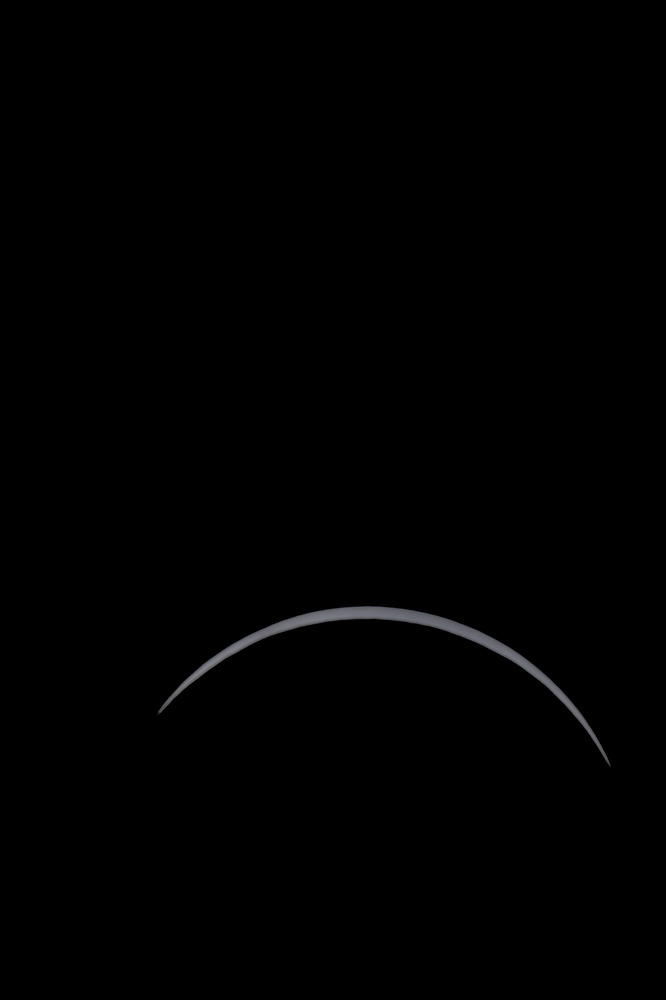

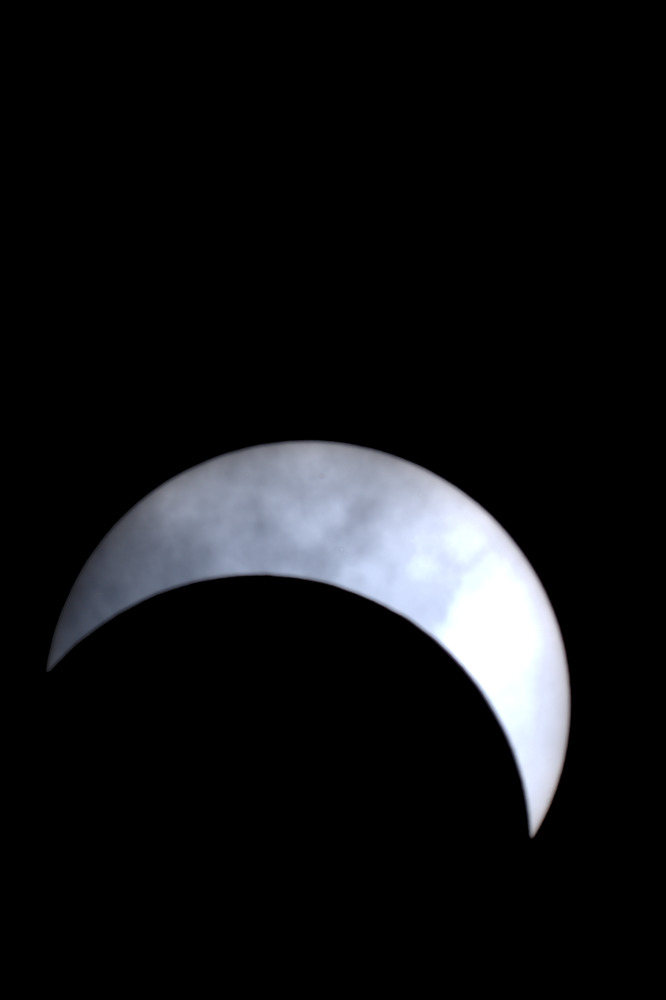
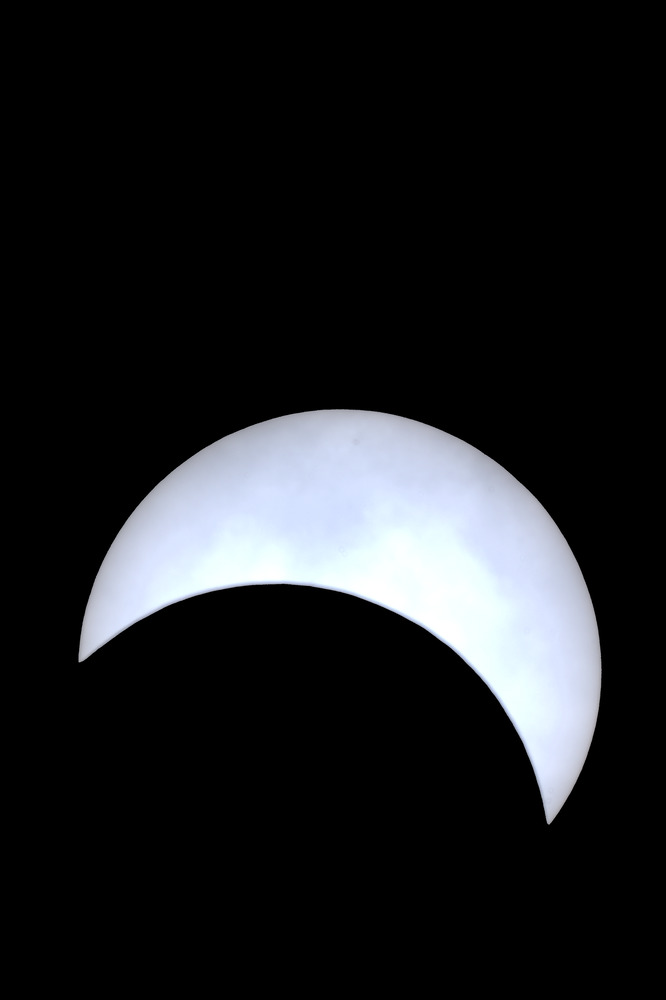
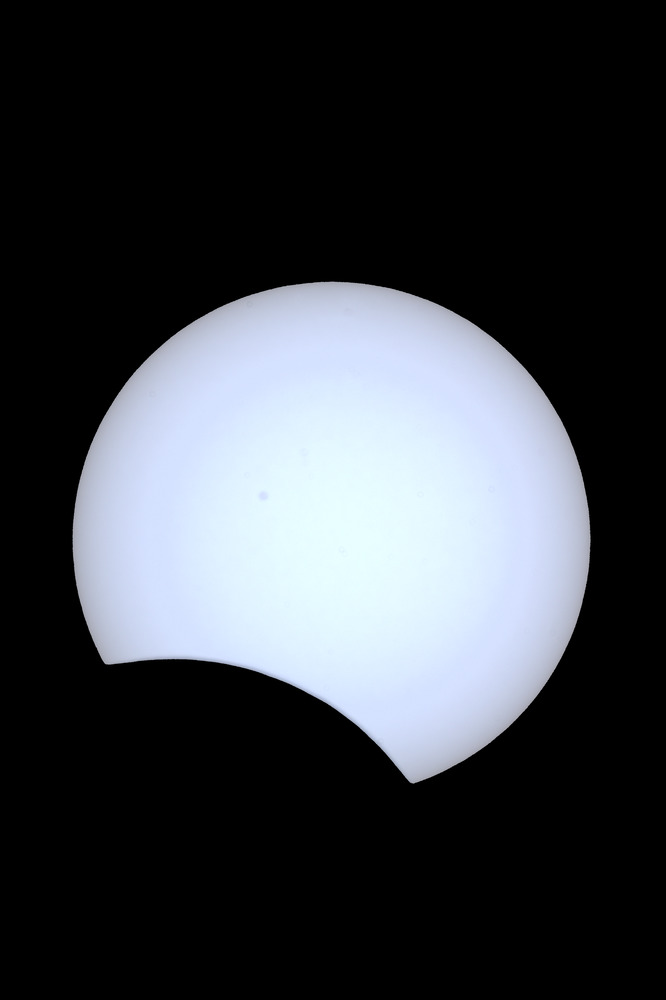
We have plenty of time to take lots of images using different settings. I've created a few test shots before the start of the eclipse and I decided to use ISO 200, 1/1600s (actually I've created test shots long before the solar eclipse so I only tested a few settings on the day of the eclipse). Most of the pictures were taken using these settings. I've also changed the exposure time for some of the pictures because of the clouds, I was using longer times, even as long as 1/200s. (Maybe I should have changed the ISO instead of the exposure time)
OD 3.8 filter was quite useful (compared to the OD 5.0) because of the cloudy weather.
I was careful (this time) and attached the camera in the correct angle.
Because of the apparent motion of the Sun I had to reposition my camera again and again after a few minutes. It is very easy using an EQ tripod, but the size of the APS-C sensor is quite small so I had to reposition very often.
The filter modifies the color of the Sun, I processed the RAW files to make the Sun white ( ufraw-batch
--temperature=5500 --green=1.3 ).
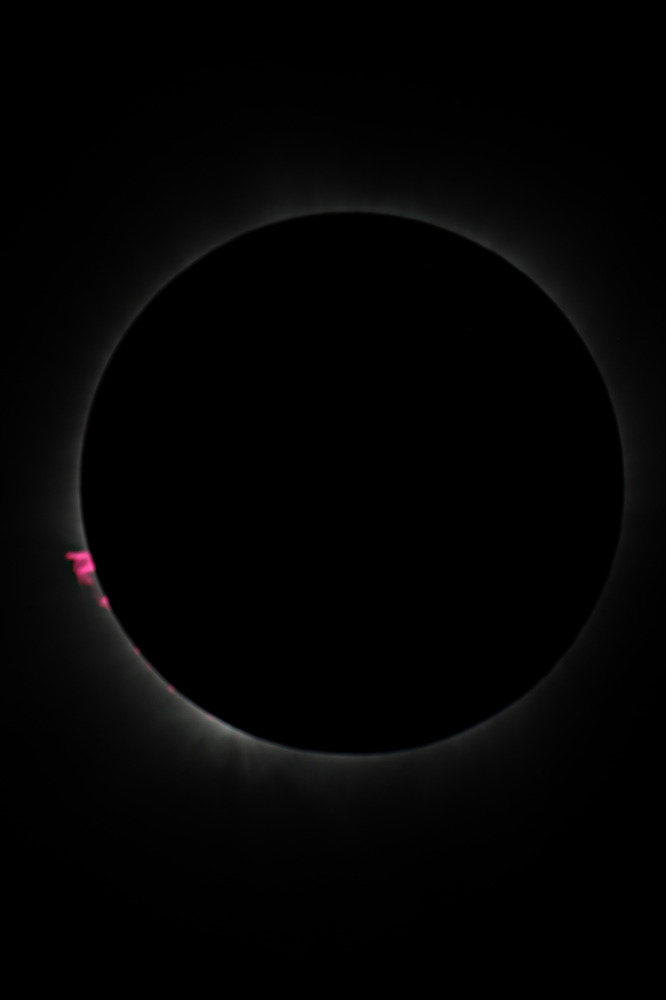
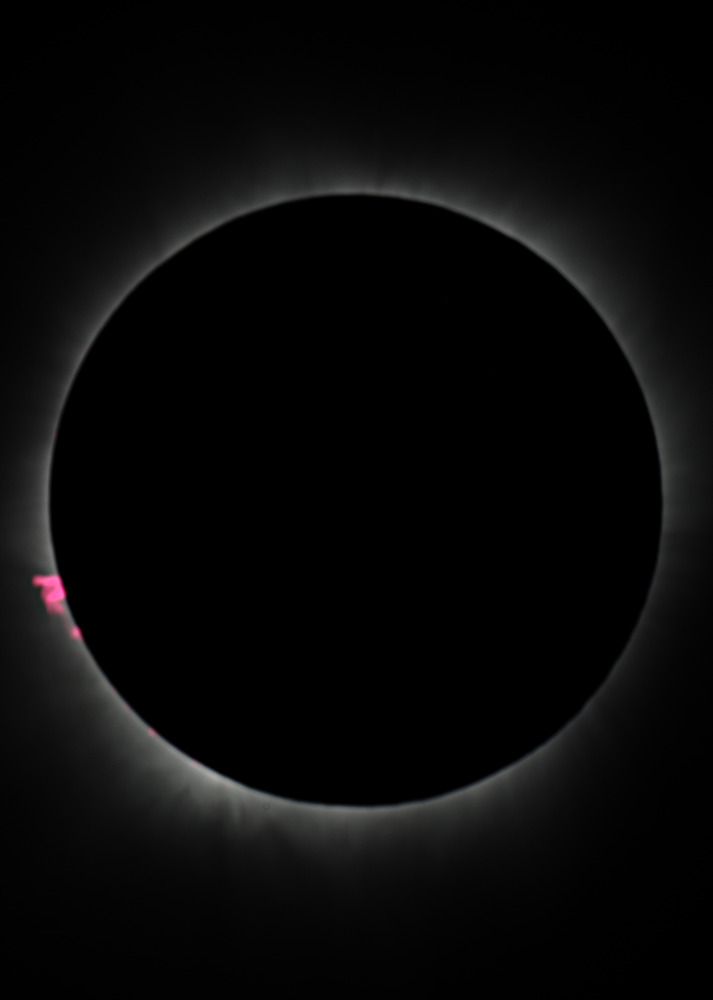
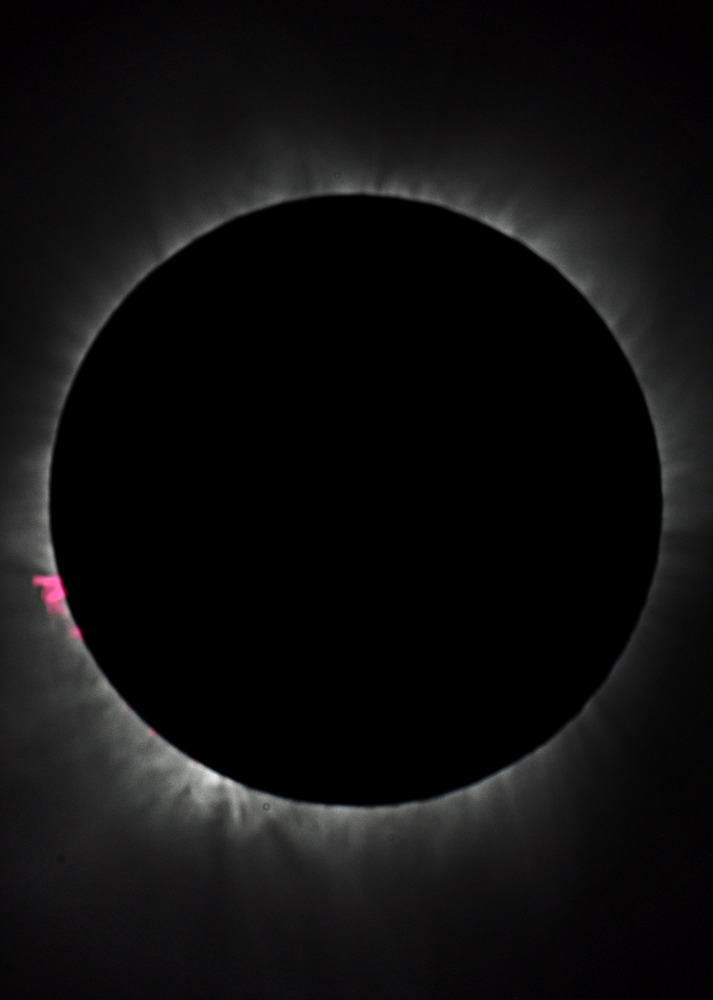
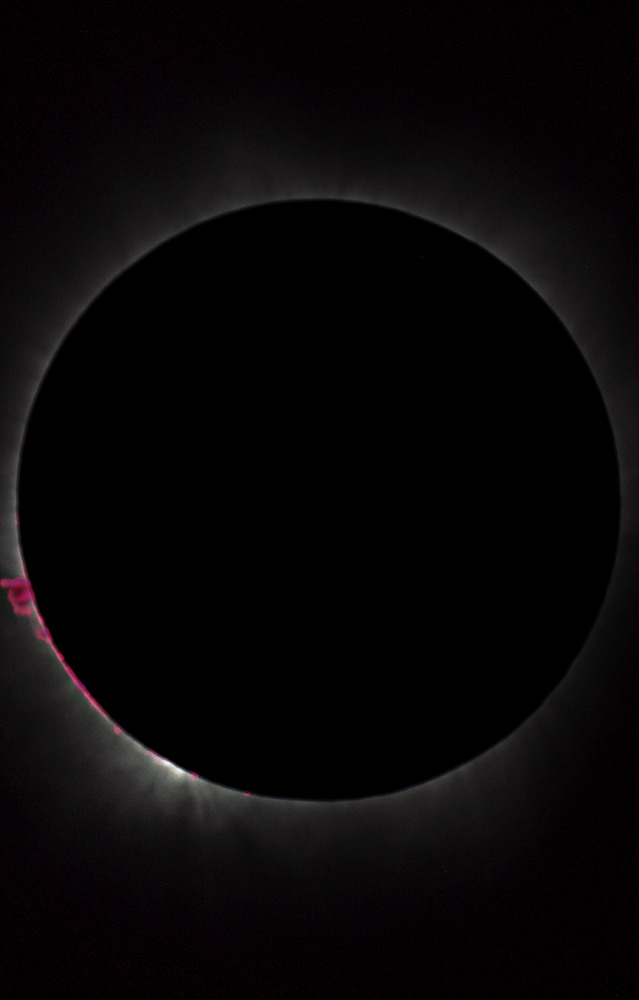
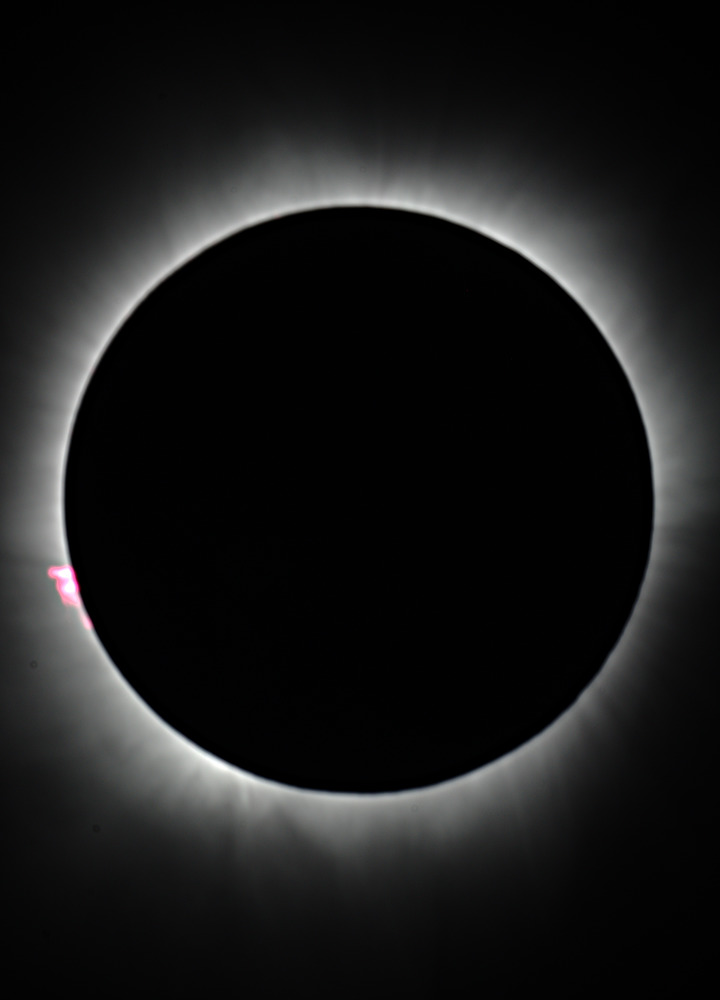
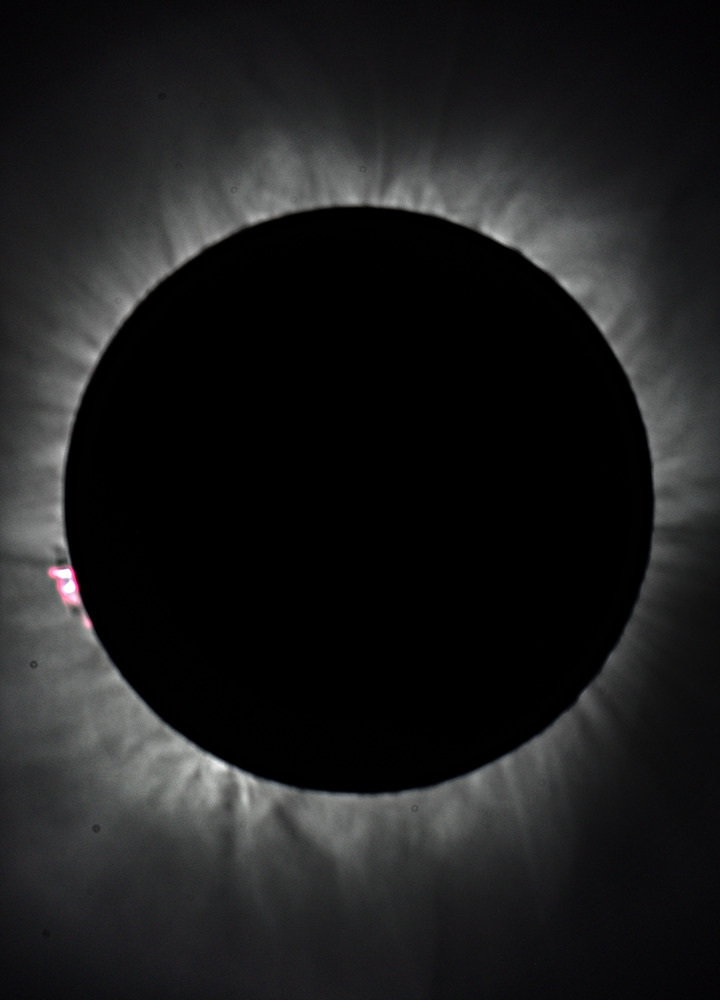
Totality, solar corona
The pictures show the corona, but only a smaller part of it because of the APS-C sensor (compared to my previous images using the same telescope and a 35mm film camera).
I was using the same equipment without the filter this time.
I was using ISO 200 for all the pictures (I wanted to avoid ISO change).
I created an exposure series (fastest time: 1/1600s, slowest: 1/15s). Using longer times would blur the Sun. Such a series can be taken in under one minute (even if I take only one picture every 3 seconds). I repositioned the Sun at the middle of the series.
Although my DSLR has lots of advantages over my film camera, I miss my dedicated shutter speed dial.
A few images without any exposure correction:


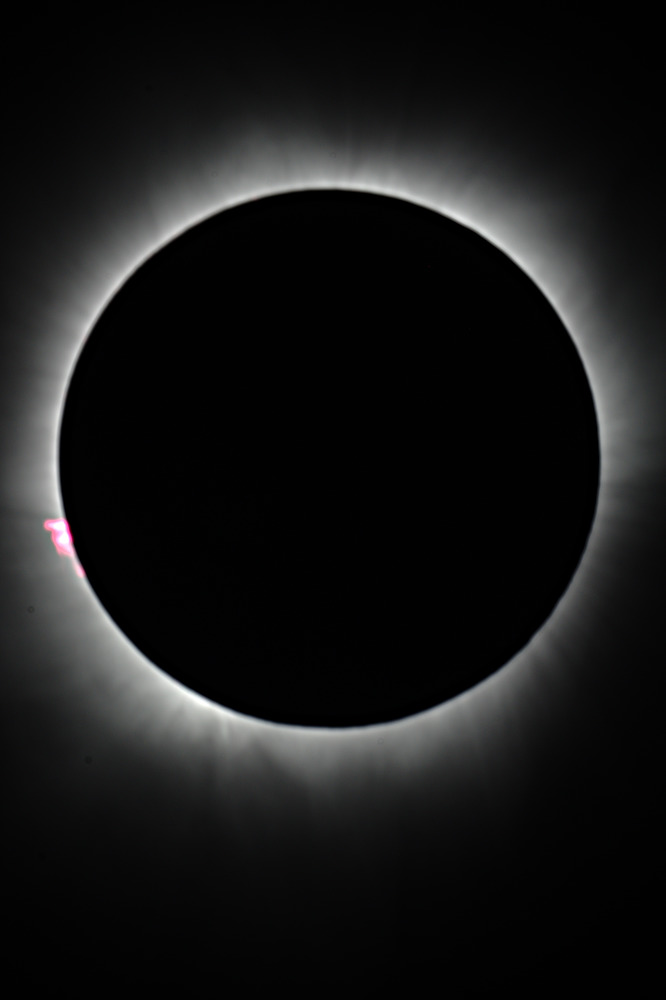
The images are very underexposed when I used a short exposure time, and the corona is not overexposed even in the 1/20s (the longest exposure time I could use without a clock drive) image. It implies that I should have been using a higher ISO value instead of ISO 200.
The protuberances looks nicer thanks to the underexposure.
My original plan was to compose multiple images using the Pellett method but even my image using the longest exposure time was not overexposed so I don't think that this method is useful in this case. I've processed the images digitally to extend the dynamic range and enhance the corona. My imagemagick-based script can be accessed here. The 1/80s image is the best but I was even able to find quite a few details in the very underexposed 1/500s image. The 1/20s image has the nicest corona, but the protuberance is too bright in that image. The Sun is placed in the middle in the following images (this is also done by my script).
raw
digitally enhanced
raw
digitally enhanced
raw
digitally enhanced
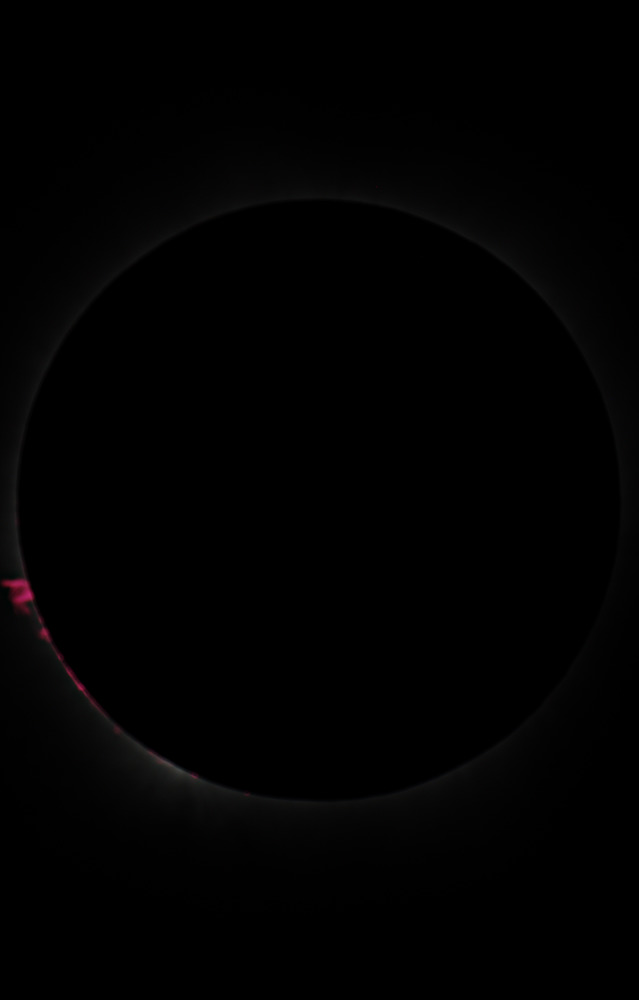
Baily's Beads
As we approach the totality the irregularities of the lunar limb allows the Sun to shine through in same places (valleys) and not in other places (mountains) which creates an effect called Baily's beads (named after Francis Baily).
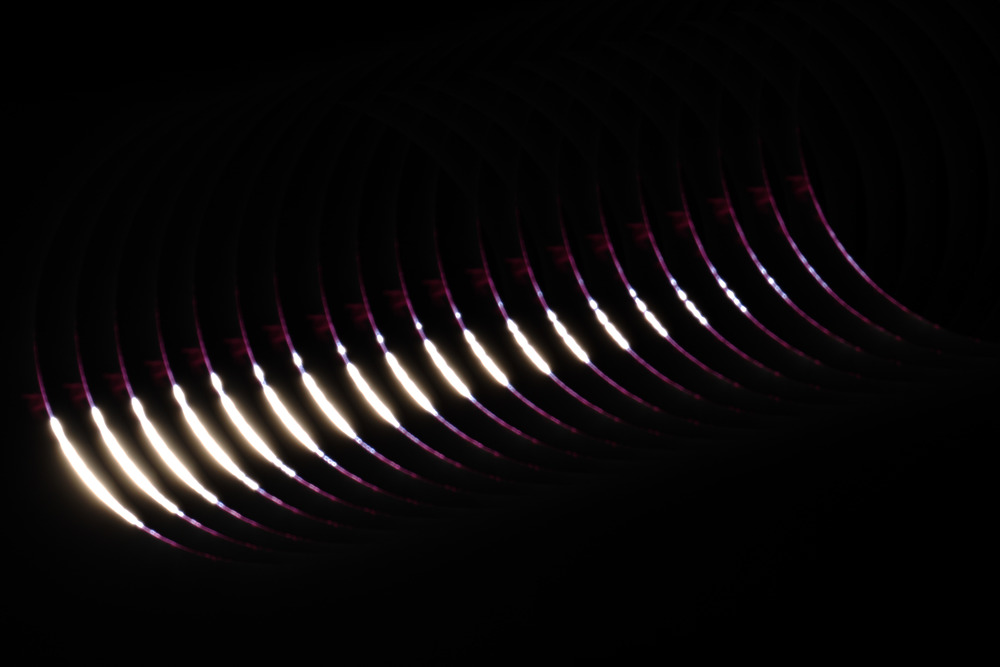
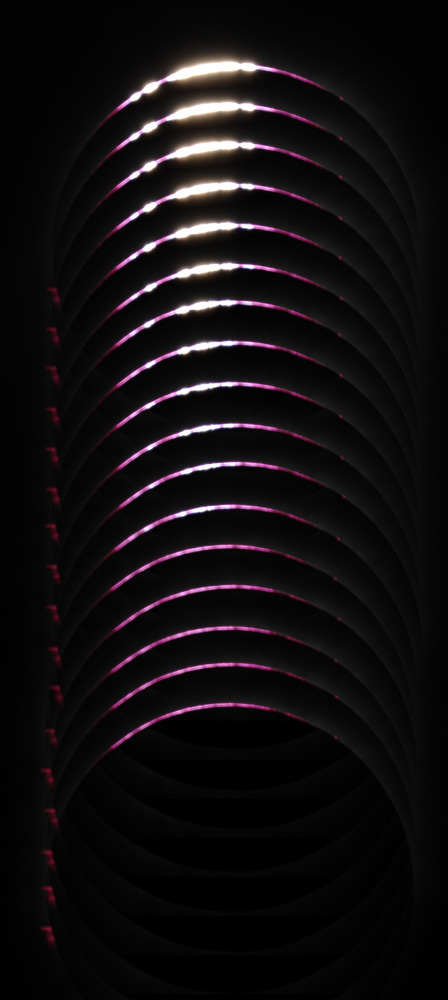
There is no need to use filter for these images. I was using ISO 200 and different exposure time for the second and third contacts (1/1600s, and 1/500s). I was using continuous shooting. There are 20 images for the second contact (spanning 8 seconds total), and 17 images for the third contact (6 seconds). Of course the images are composed digitally.
It is possible to calculate the exact time for the second and third contact but it is still a bit difficult to catch the moment. Of course we can take lots of images using a DSLR.
I've tried different exposure times but the images look quite similar. The beads look the same, only the length of the arcs differ. It might only be a problem if we would like to merge the second and third contact images. Merging the images is not a good idea anyway because we were too far from the centerline.
The pictures also show that focusing was not too good.
I've only realized after the eclipse that Solar Eclipse Maestro has a Baily’s beads preview, so we can check the beads in advance. After the eclipse the author checked photos (including mine) to show that his simulated beads are very similar to the real ones.
Diamond ring
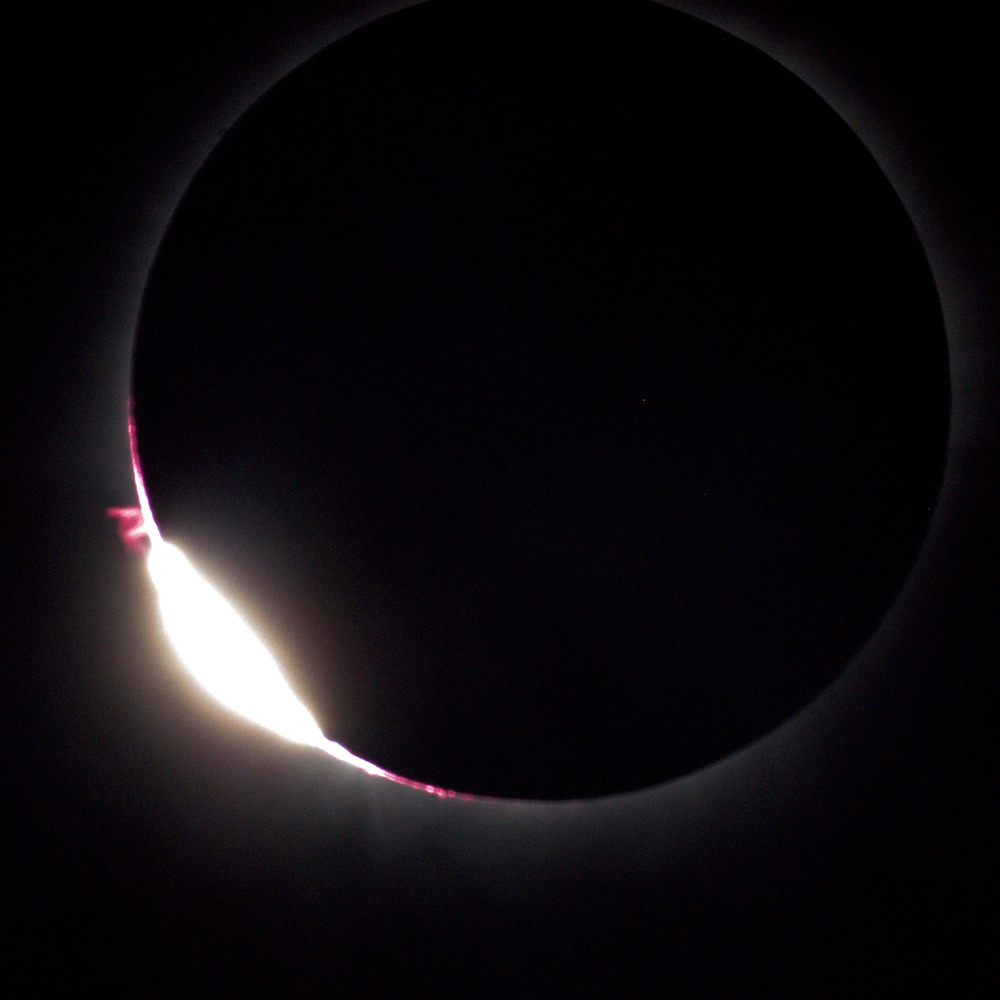
2nd contact
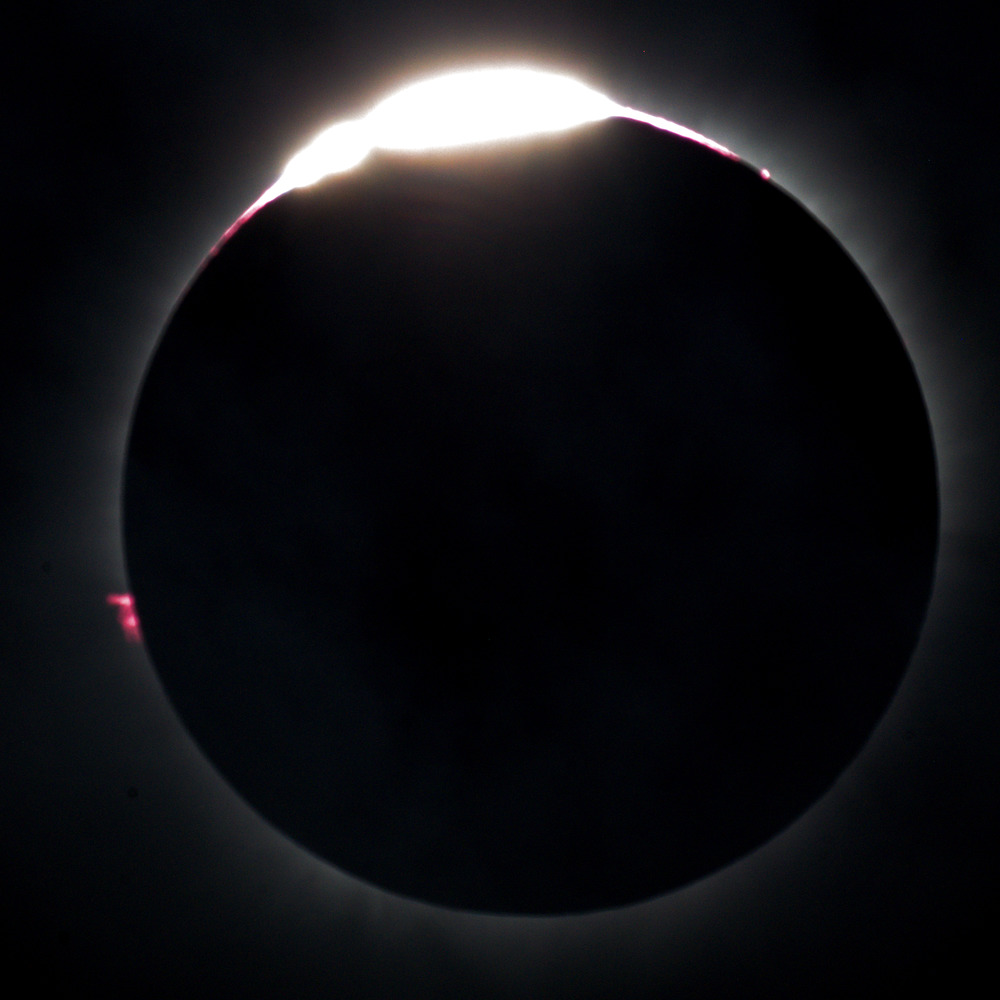
3rd contact
Modifying (exposure correction, contract, ...) two images of the Baily-series I've created images showing the Diamond ring. Some part of the Sun is not visible in the 2nd contact image.
Video
I've created a video using the still images I've taken during the exposure:
- I merged 200 images but the video is still not smooth and long enough.
- I was not using an intervalometer, so the delay between the partial phase images are not always the same which can be seen in the video.
- The speedup factor is much higher during the partial phase than the speedup factor used during the totality and Baily.
- The Sun looks smaller during the partial phase but it's only an optical illusion I was using the exact same enlargement factor.
- Of course aligning lots of pictures is difficult. I've created and imagemagick based script to automatize it. It was working quite good, but it had problems with the clouds.
Multiple Exposure Sequence - 12 min
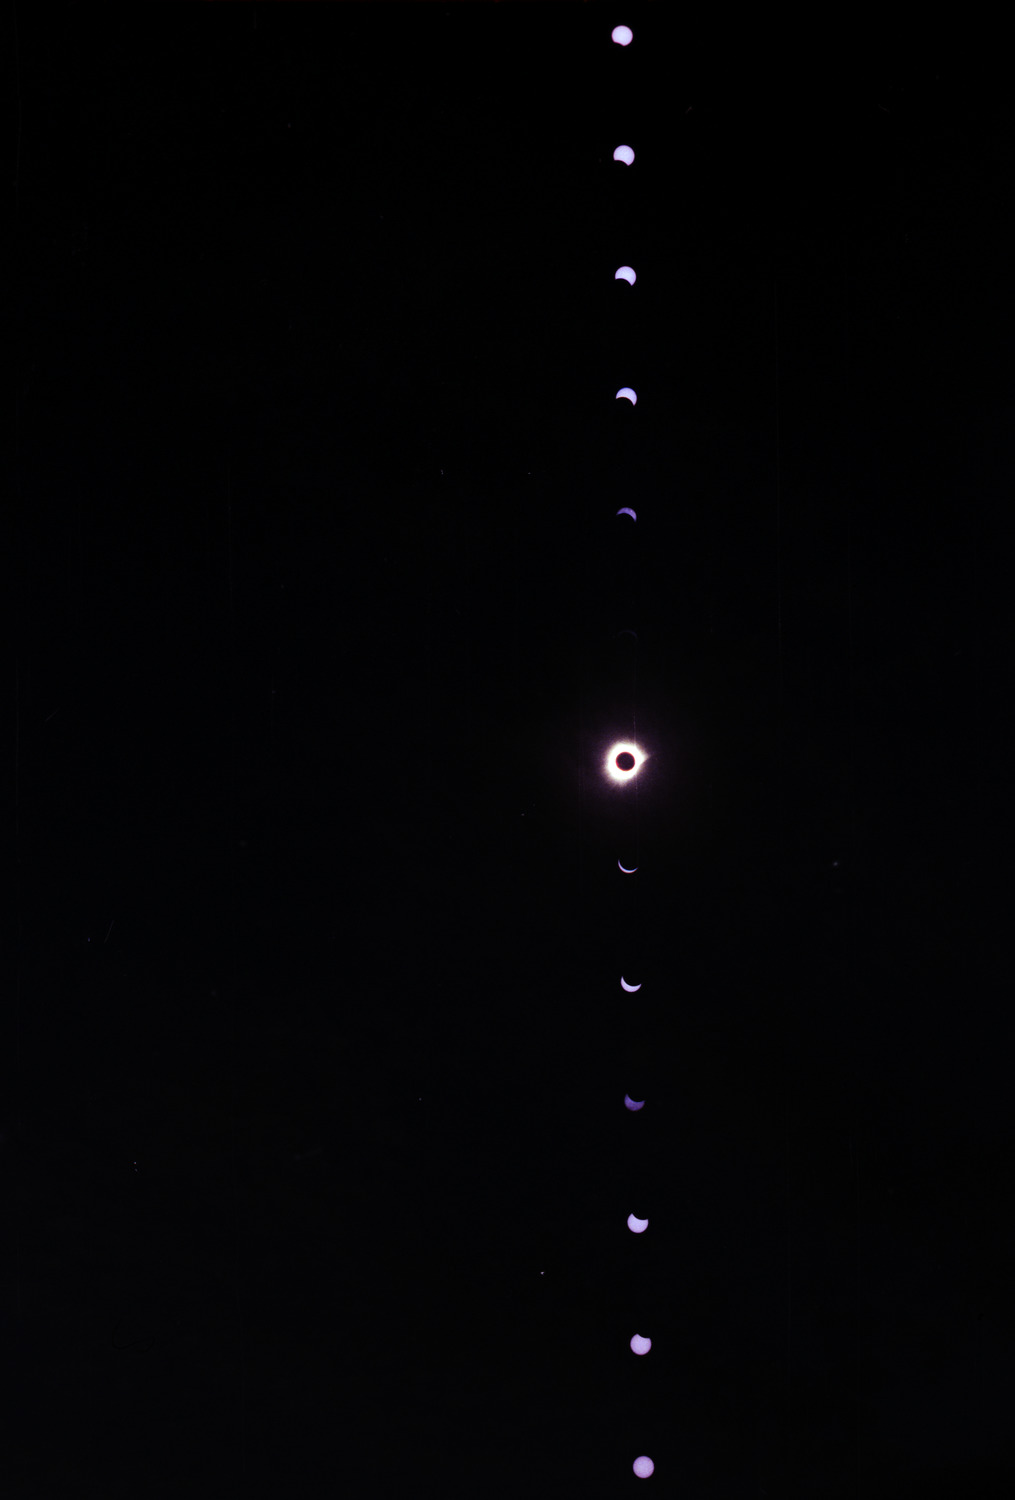
This photo shows several pictures of the partial phase and the totality in the middle. No digital editing, no post-processing, the picture is taken on a single negative.
Equipment
We need a camera which supports multiple exposures (without advancing the film). I was using a Revue AC-5 camera (basically it is Chinon CP-7m) and a standard 50mm lens (SMC PENTAX-A 50mm f2)
ISO 400 negative (Fuji Superia X-TRA 400), aperture f22 (f11 for one of the pictures when the sky was rather cloudy), exposure time for the partial phase is 1/2000s (OD3.8 Baaded Astrosolar Filter), for the totality it is 1/4s. The delay between the exposures is 12 minutes. A sturdy tripod is a must, I was protecting it (for 2.5 hours) nobody should move it.
The equipment can be seen at the right side of the above image.
Preparation
It is possible to create test exposure sequence pictures of the Sun before the solar eclipse. I've also tested my filter and determined the following parameters:
- Lens: I've also tested my f1.9 and f1.4 lenses but the test photos were very similar so I was using my f2 again. (Why do I have 3 pieces of 50mm lenses?)
- Partial phase - aperture: To avoid overexposure (this time my filter was OD 3.8 instead of OD 5.0) I was using the smallest aperture of my lens: F22.
- Partial phase - shutter speed:. To avoid overexposure I was using the shortest time of the camera: 1/2000s. The same time for all the partial phase images (except one when the sky was rather cloudy).
- Delay between the exposures: I've already created an image in 2006 with 15 minutes delay, so I wanted to increase the frequency, my delay was 12 minutes this time. (Revue AC-5 has a built-in interval timer, so it's easy to set it up.)
- Totality - aperture and shutter speed: Last time I was using F8 and 1/2s but the shutter speed was too long, so this time I was using F8 and 1/4s.
Of course the most important frame shows the totality, so we have to calculate the times relative to the time of the totality.
Remarks
- It's a good idea to add a nice tree or an interesting building to the picture. The dark silhouette makes the image more interesting. There was a nice tree close to us, but it was not possible to add this tree to the image. It seems to me I need a more wider lens if I want to add a tree to this image, which would make the size of the Sun smaller.
- Of course it's much easier to create several images and merge them digitally by choosing the best ones. For me it's more fun to create the image without any post-processing.
- This first partial phase image after totality can be hardly seen. The weather was cloudy that time, I've changed F22 to F11 but it's still too dark. The aperture should have been even larger.
- F8 1/4s is much better than the previously used F8 and 1/2s. Maybe F5.6 1/8s would be even better.
- Well, I was unable to position the images to the middle of the frame.
Without tripod
What picture could you make without a tripod? ( Unbelievable, there are people who want to travel without tripod(s) and telescope(s). ) The next image was taken using a small Pentax Q-S1 camera and basic zoom lens. The picture was taken by my girlfriend who was a very useful helper during the eclipse.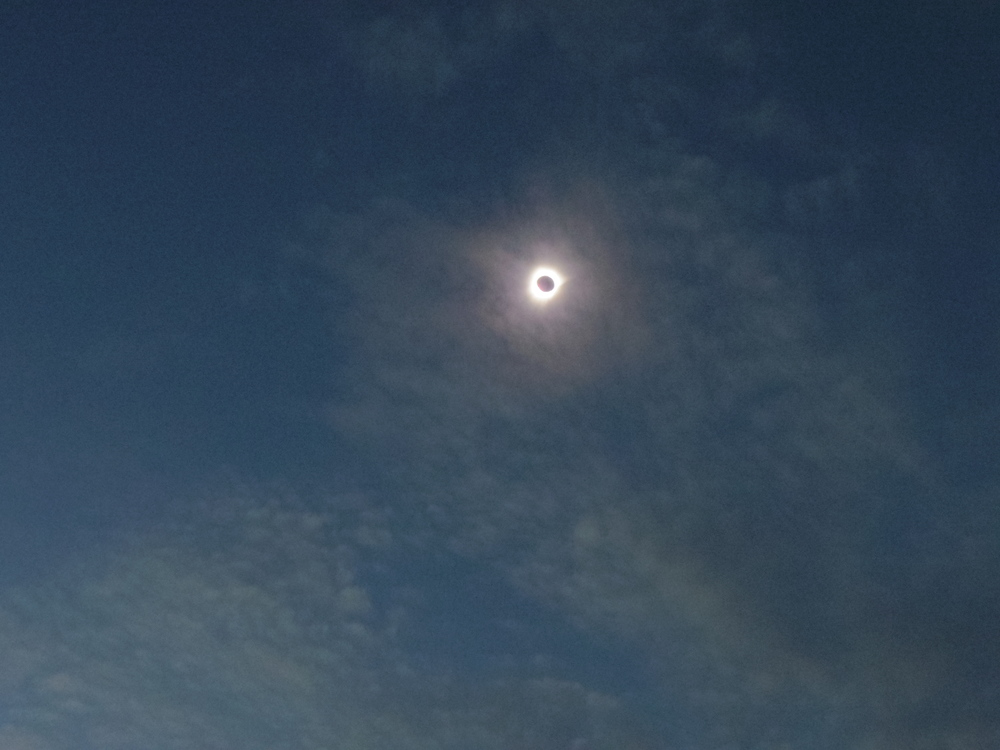
ISO 1600, f4.5, 1/30